There are certain resources in Azure that you don't ever want deleted. For example, deleting a SQL database means you'll also be losing all the data in its tables. You simply don't want to do it. Here's where resource locks come in. The help you 'lock' down a resource to prevent accidentally modifying it or worse, deleting it.
What about RBAC?
Role-based access control helps you provide specific permissions to users of various Azure resources, resource groups and subscriptions. You can read about it in more detail here. However, it doesn't address the problem of accidental changes/deletes by people who do have and/or need those permissions. In such a case, you can use a resource lock.
Types of locks
There's two types of locks currently offered. These can be applied to a subscription, resource group or a resource.
- Read-only: Lock you out from making any changes to the item.
- Delete: Prevents you from deleting the item.
How to add a resource lock
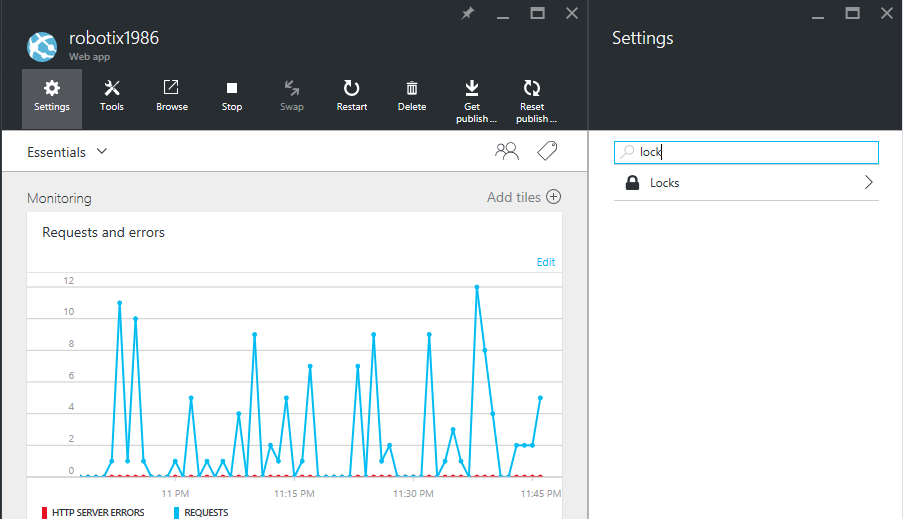
Adding a lock is really simple. First, you navigate to the management locks blade from your resource.

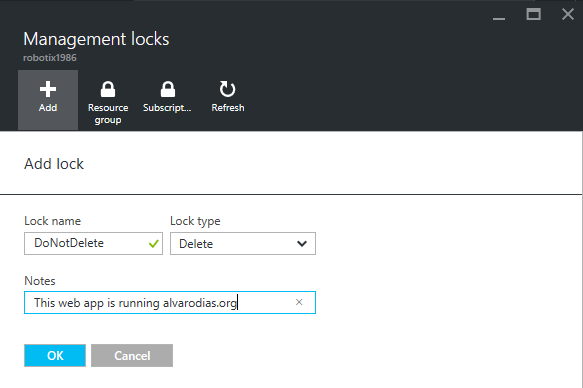
Next, you click the (+) Add button and fill out the form.

More about locks
When you create a lock in the Azure Portal, you're actually creating it in the Azure Resource Manager. This means that locks are respected no matter how you interact with the resource, whether using the Azure Portal, PowerShell, or calling the ARM APIs directly.
You can read more about locks here: [Lock resources with Azure Resource Manager] (https://azure.microsoft.com/en-us/documentation/articles/resource-group-lock-resources/ "Lock resources with Azure Resource Manager")
Also, here' a good post on interacting with locks using PowerShell: https://blogs.msdn.microsoft.com/cloud_solution_architect/2015/06/18/lock-down-your-azure-resources/
