Hey folks,
Previously I've talked about how you can customize your dashboard and personalize it to suit your needs: Make the Azure Portal Dashboard your own. In this blog post, I'd like to go about exploring the new features and capabilities recently released the Azure Portal to build, publish, and share dashboards.
Through various feedback channels, the Azure Portal team has received requests to enhance the dashboard functionality and add capabilities such as:
- create multiple dashboards
- give them names to indicate their purpose
- create team dashboards
- share dashboards with others
The latest release of the Azure Portal enables some of these capabilities. All the awesome customizations you've been doing on your dashboard can now be published to the cloud and shared with your colleagues. Moreover, you can create multiple dashboards and choose which to keep private, which to share, and whom to share them with.
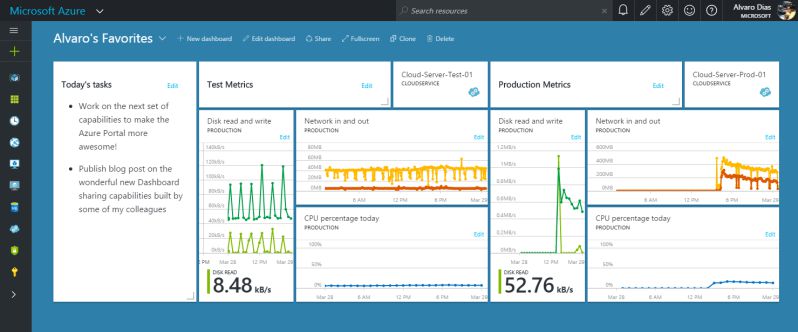
Here's a dashboard I recently created for my day-to-day use.
So without further ado, lets get our hands dirty.
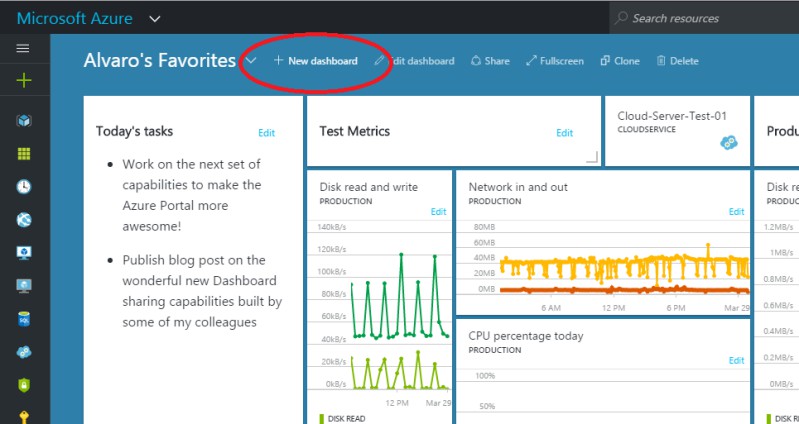
Step 1 - Create new dashboard
Click on the 'New dashboard' button and give your new dashboard a snazzy name.
Step 2 - Add tiles
You can add tiles from a wide variety that are available in the tile gallery.
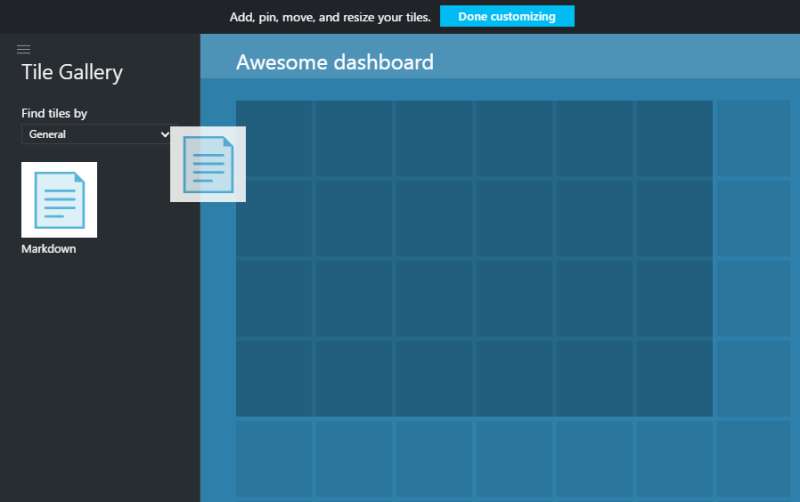
For more information on the tile gallery read my previous post on it.
Step 3 - Share
You can share your dashboard with others who have permissions to your subscription by clicking on the share button.
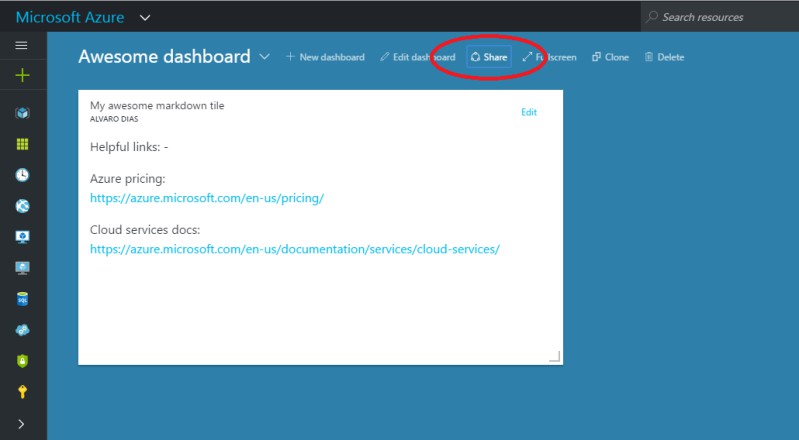
On the sharing pane that opens up, verify that all fields are correctly filled-in and click Publish.
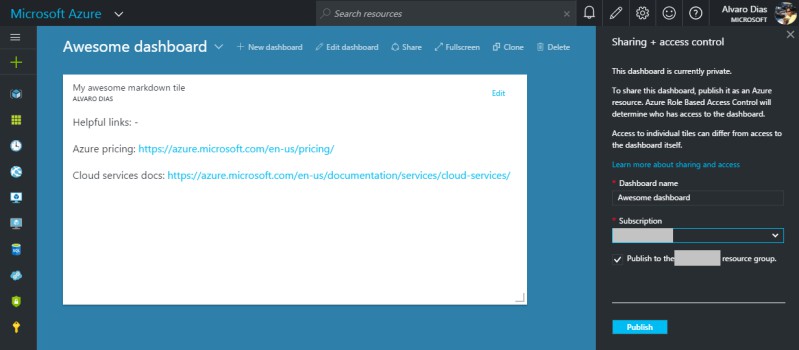
Voila! You now have a dashboard that is shared with others in your subscription.
Once your dashboard has been shared, you can configure which users have access to the dashboard by clicking the "Manage users" button on the share pane. This will take you to the RBAC (role-based access control) blade.
You can read more about sharing portal dashboards at
